Like most people who take a lot of digital photos, I edit my photos before I print them or post them on my blog. In the past I've always used the editing software that came with my camera and this has produced reasonably good results. However, I've just found software that is easier to use and does a much better job. It's called Picasa 3 - and you can download it for free!
WHAT PICASA CAN DO
.
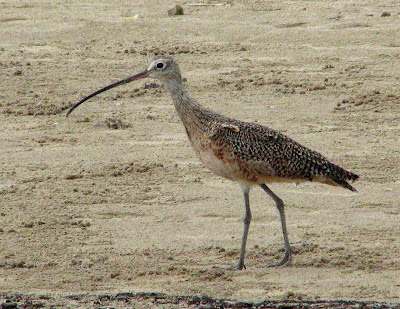
Look at the photo of a Long-billed Curlew below. I think you'll agree that it is pretty bad: The picture is on a slant, the bird is so small in the frame that it's hard to see, and the whole photo looks flat and washed out.
.

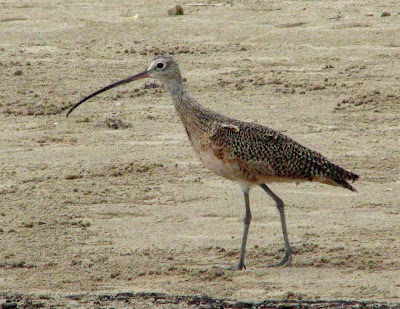
Now look at the photo below. It certainly isn't a masterpiece but I'm sure you'll agree it is much better than the first one.
.
In fact, picture #2 is just a digitally edited version of picture #1. It was produced in 5 minutes using Picasa 3.
.
Let me take you through the steps that turned photo #1 into photo #2.
.
STEP 1: GET IT STRAIGHT
The 'Basic Fixes' section in Picasa has a function called 'Straighten'. You just drag a slide bar at the bottom of the screen until the picture is truly horizontal.
The 'Basic Fixes' section in Picasa has a function called 'Straighten'. You just drag a slide bar at the bottom of the screen until the picture is truly horizontal.
.  .
.
 .
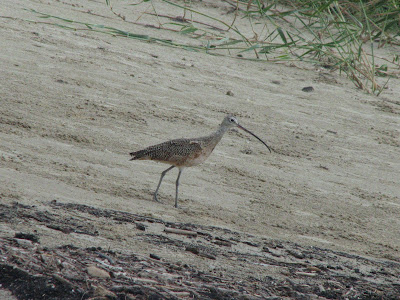
.STEP 2: GET IN CLOSER
The Curlew was a long way from me when I took the original photo. So, even though I used a zoom lens, it looks very small in the photo.
.
No problem. I go to the 'Crop' feature in the 'Basic Fixes' section of Picasa and now I can make the Curlew fill more of the frame.
.

STEP 3: FLIP IT
An odd thing about our culture is that, because our writing is oriented left to right, we tend to look at pictures the same way. In my photo, the Curlew is oriented left to right and so our eyes tend to follow its direction and to move out of the picture very quickly. The solution is to press Ctrl + Shift + h in Picasa, and the bird is reversed. Most people will prefer this version.

STEP 4: CONTRAST & COLOR
The photo still looks very flat and washed out. This is easily fixed in Picasa. You click on 'Auto Contrast' and 'Auto Color' in the 'Basic Fixes' section and the program will improve the photo for you. (If you prefer, you can click on 'Tuning' instead and make adjustments to the contrast and color yourself.)
.
.

STEP 5: SHARPEN UP
The photo is okay now but it's not quite as clear as I would like it to be. So I go to "Sharpen' in the 'Effects' section in Picasa and this improves the picture a little more.
.

In case you've forgotten how bad the original photo was, here it is again for comparison.
... give it that old-fashioned sepia look.

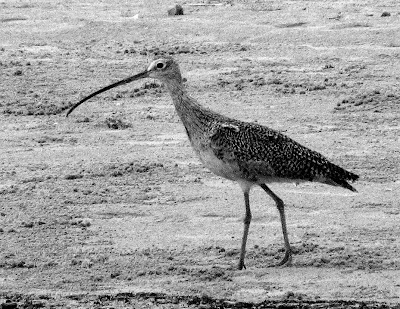
Note:
The 'Effects' section of Picasa 3 also lets you do things like convert the photo to black-and-white or ...
... give it that old-fashioned sepia look.
No comments:
Post a Comment